Review
It's a special game of its kind. If you're a fan of PvE in MMORPGs, then you'll feel right at home with playing this game, though there's a slight difference (perhaps a bit easier IMHO) - you get to control all the characters in your 4-man team (1 tank, 1 support [which technically is a healer most of the time and a dps if the fight's easy] and 2 dps - you can choose either ranged or melee) and you get to pause the game whenever you like to issue commands.
 |
| Your 4 starting team members |
Don't worry that you'll get stuck with only 4 fixed characters throughout the game though - you can swap team members with other characters at the beginning of each new sub-chapter of the game. The characters each will have their own skill trees (to upgrade their skills), but are limited to 4 skills each.
 |
| My tanker's skill tree - all into self-healing, coz survivability's very important, you know :P |
Like any good PvE, the mobs/boss fights are not exactly straight forward tank-and-spank 100% of the time - your characters will definitely die that way. Instead, you'll need to do some strategy thinking - like how to position your characters, which boss spells to interrupt and which ones to just endure it, when to pop reduction spells onto the boss/buff (with limited duration) spells onto your tank.
There are also several (compulsory-in-order-to-proceed-in-the-game) puzzles within the game as well that are fairly easy if you get what's the pattern that keeps the puzzle ticking.
There are also several (compulsory-in-order-to-proceed-in-the-game) puzzles within the game as well that are fairly easy if you get what's the pattern that keeps the puzzle ticking.
 |
| An example of the first puzzle :) |
However, on the downside, I personally think the dialogues are choppy (or, in other words, seems laggy, although it's not an online game and it's not my computer's problem either) - I think they designed the 'pause' between dialogues to be slightly too long, so it looks like each character is waiting for the other to speak lol. Moreover, the dialogues are mostly crap (IMHO) - I prefer some friendly and funny banter from time to time but then in this game, you can actually identify which part of the dialogue the game developers want you to laugh at and somehow, those parts are just not funny (enough).
General tips for character survival
One major tip that I find is particularly useful is saving - save after every fight! Seriously, just do it. Some times, you'll find yourself facing new mobs that somehow managed to occupy your attention so much until you forgot about some of your other characters (I'm too used to MMORPG where you just have to know what to do with your character without needing to care for the other members of your team and their respective roles too much)... bam, total wipe! Unless you fancy starting all over again every time you 'accidentally' wiped out your team, it's always safe to save.
Next major tip is read the enemy details - Every one of them (if there are various types of enemies). Why this is important? Well, firstly, you will know who your tank should taunt, who your dps should kill first or how you should position your characters (ranged have to be x metres away from mobs to avoid silence or the certain-spells-blocking aura? When should melee dps run from boss to avoid devastating AoE? etc). For boss fights, if you don't read the details, you'll probably get wiped over and over and over again. I've mentioned before right? It's no tank-and-spank. Once you know the enemy, then you plan your strategy. :)
Furthermore, in this game, you don't get to use potions (as there are no potions), so that does toughen up the game a little. So, remember to manage your healing spells well - some of them may have a long cooldown or some of them have a long incantation time. Note that you won't be able to ask your healer to heal her/himself unless it's an aoe heal.
If your tank is down and his/her corpse is not in any harmful circle on the ground, get one of your dps (preferably the one with lower aggro) over to the tank immediately and try to revive him/her. The other, higher dps should already have aggro on most of the mobs and should start aggroing mobs off your healer (by dealing huge dps on the mobs). Heal your ass off on your other dps that is suffering most of the damage (and since the healer cannot heal him/herself, unfortunately). Usually, once your tank is down, it's really hard to recover - but it is still possible! I've done it. So, try, before loading your last saved. :) Once your tank is back up, use him/her to re-aggro the mobs back from the dpser who is acting as a temporary tank (more like a scape goat :P).
If your tank is down and his/her corpse is not in any harmful circle on the ground, get one of your dps (preferably the one with lower aggro) over to the tank immediately and try to revive him/her. The other, higher dps should already have aggro on most of the mobs and should start aggroing mobs off your healer (by dealing huge dps on the mobs). Heal your ass off on your other dps that is suffering most of the damage (and since the healer cannot heal him/herself, unfortunately). Usually, once your tank is down, it's really hard to recover - but it is still possible! I've done it. So, try, before loading your last saved. :) Once your tank is back up, use him/her to re-aggro the mobs back from the dpser who is acting as a temporary tank (more like a scape goat :P).
Additional tip: Typical mobs-killing order
1. Kill anything that heals FIRST - if it can heal a lot without incantation time - then it should be the top of your list of things to kill.--- If it can ONLY self-heal, then it's not very important.
--- If the heal can be intercepted, then it is not important as well (but you'll need to position your character accordingly).
--- An example: Son of hydra
2. Kill anything that has very long crowd control (CC) spells - like charm, knockdowns, etc
3. Kill anything that has buffs that will cause major disadvantage to your team (excluding slowing movement speed, reduced heals -- these are not really important) - such as silence, cast invulnerability to other mobs, block support spells etc OR has AOE damage/ can damage more than 1 target at a time (you can handle damage but can you handle huge damage to ALL of your characters at the same time? I think not :P).
4. The rest of the mobs in whatever order you like
And the usual advice still stands - DO NOT stand in anything that damages your characters, use pause to avoid pass-through projectiles (these spells can cause a lot of damage) etc
(P/S: Stuff like damage is not really important most of the time. Keep a vigilant eye out for your characters' health bars and heal appropriately)
Stats tips
Stats-wise, I suppose you should already have a general idea of it, using common sense.
Generally, tanks would need +HP, +% healing received, + magical or physical armour, -xx control/reduction effect or + resist, but if there's an occasional +%physical damage, that's fine as well (note that although most tanks use physical attacks as default, some of them will have a magical skill instead).
Generally, tanks would need +HP, +% healing received, + magical or physical armour, -xx control/reduction effect or + resist, but if there's an occasional +%physical damage, that's fine as well (note that although most tanks use physical attacks as default, some of them will have a magical skill instead).
For dps casters (casters who causes only damage), %magical damage should be your priority, unless their health is too low, then you should add +HP. Second priority should be %mana regeneration. The rest are optional, but ofc having %healing done or %physical damage is totally useless on these guys.
For melee dps/ ranged physical dps, %physical damage should be your priority, +HP or critical hit chance secondary. As usual, the rest are optional, but ofc having %healing done or %magical damage is redundant. Some may consider melee dps as second tank, but in this game, although some dps do have +dodge skills, these guys are still pretty squishy - My advice? Just consider these guys as dps as what they should be.
For melee dps/ ranged physical dps, %physical damage should be your priority, +HP or critical hit chance secondary. As usual, the rest are optional, but ofc having %healing done or %magical damage is redundant. Some may consider melee dps as second tank, but in this game, although some dps do have +dodge skills, these guys are still pretty squishy - My advice? Just consider these guys as dps as what they should be.
Lastly, for healers (or support, as the game calls them), %healing done is a priority, with +HP a second priority if their health is low. If not, then the second priority should be %mana regeneration. The rest are optional. Naturally, having %magical damage is pretty useless since most support characters are physical damagers by default, but may or may not have a magical damaging skill.
Skill tree tips
I'm too lazy to write this out, so yeah, do check this out: http://adf.ly/qwE2Z :)Grouping tips
My advice for this is go with whichever classes that you feel most comfortable with (but you should at least have 1 tanker and 1 full-time healer).I myself is a caster type person. I don't like melee as much or getting the killing done up close and personal - except if I get to stealth kill the mobs (1-shotted!). Anyway, as you can see from my screenshots, my favourite grouping is
Wendaroo (Full-time healer), Nella (mainly single-target dps, with off-heal duties), Loch (Full dps, specialised in AOE dps) and lastly Knokka (Tanker, coz of her self heal skill).
Some may choose to swap out Loch for Motcha (since he has an ability to remove cc which is superb for when your healer is getting charmed by the enemy lol), but then your grouping will have lower dps.
Walkthrough
This is just a simple walkthrough for boss fights and puzzles only. Mobs you should be able to handle them on your own. Just remember, taunt any mobs off your healer if you can; and if you cannot, get all your dps on the mob attacking your healer... don't let your characters stand in anything that harms them, avoid projectiles that can be avoided (use pause game to your advantage) and don't forget to heal!
**Note: I believe I must have skipped a boss (the first one) but anyway, I'll just label the first boss fight that I remember as the 'first boss'.
** I've organized them in terms of the order of encounter.
** I've organized them in terms of the order of encounter.
First boss fight - Elemental of Light
There are 2 stages in this boss fight. The second stage only happens after the boss hits 50% health.
(I'm so sorry for the lack of screenshots, I've played for some time - like after 3 bosses and 4 puzzles, before I've decided to do this pictorial walkthrough [instead of a youtube video - coz my laptop does not have enough memory for all those Fraps footages])
For this fight, you are still using your starting team members so you should have 1 tank, 1 support, 1 ranged dps and 1 melee dps.
For this fight, you are still using your starting team members so you should have 1 tank, 1 support, 1 ranged dps and 1 melee dps.
First stage
 |
| My strategy map for the first stage :) |
 |
| When the boss hits 50% health... |
Second boss fight - Chimera
 |
| My bad - the 'red pie chart sort of stuff' should be named as 'casting time countdown' |
Elite fight - Necromancer
You'll meet him at the second skeletal bones arena.
 |
| The first part is straight forward, but once the adds were spawned... (Edited. Just realised my text somehow gotten jumbled up lol :P) |
Puzzle 1
The red boxes will make your character jump 3 boxes forward
The purple boxes will make your character jump 1 box forward

Puzzle 2

Puzzle 3

Third boss fight - Lord of Pain

Puzzle 4
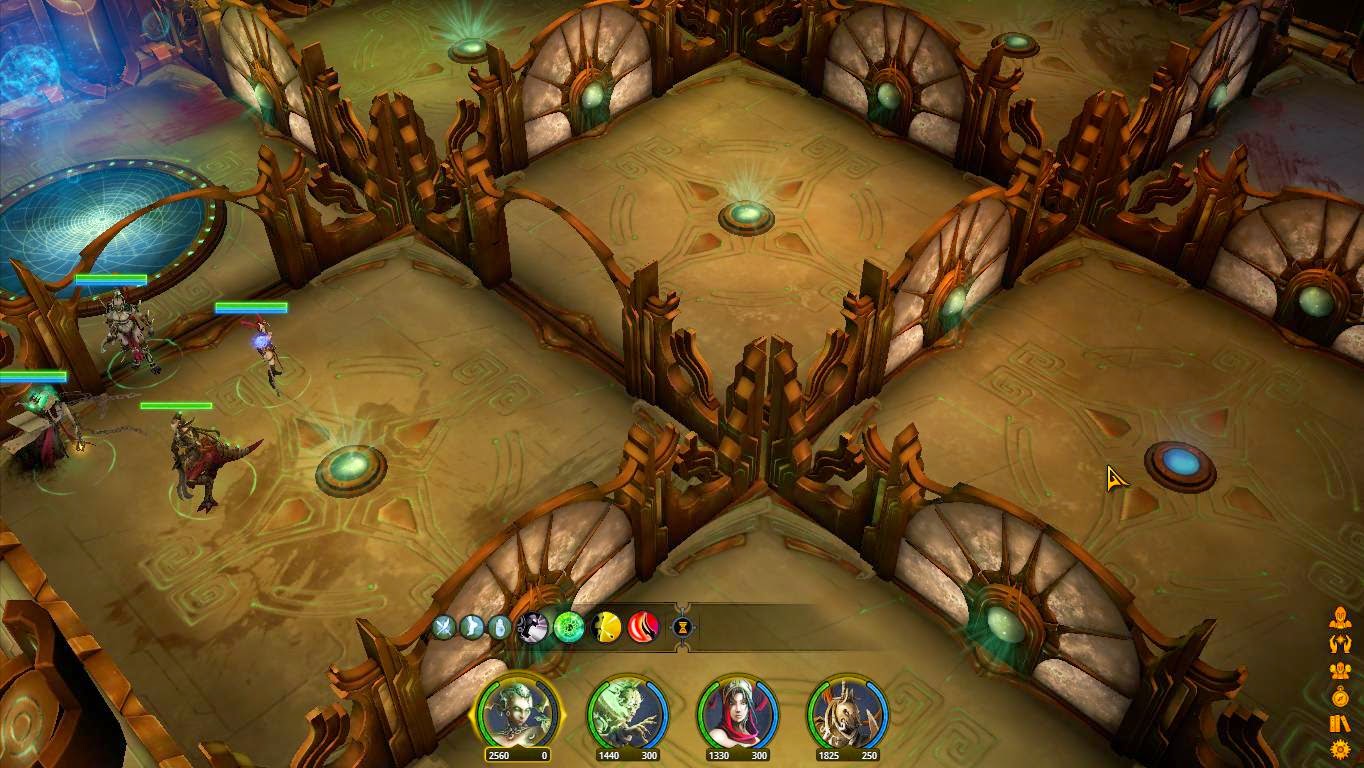
This one's pretty straight-forward, but you'll need precision and good timing :) So, what you'll need to do is to get each of your characters down each lane and step on the stone plate at the end. How to do that?
- First, AVOID THE BLUE STUFF - they teleport you back to the start of each lane.
- Note that there's a BLUE STUFF patrolling the stone plates at the end of each lane, so you DON'T STAND YOUR CHARACTER ON THE STONE PLATE unless you have ALL characters NEAR to the plates (refer to screenshot below).
- Optional: I'd recommend you to SAVE before attempting to step on the stone plates. Just in case your timing is off and your character gets teleported to the start of the lane.
- Then, one by one, stand your characters on the plates, the last one might be a bit tricky - you'll need to be fast.
- Once all characters are in place, the door will open! :)


Fourth boss fight - boss is the same one from the First boss fight.
However, the fight mechanisms here are a bit different - there are other mobs in the vicinity that you'll need to kill first. Follow the instructions below and ignore other mobs. If the other mob (excluding black priest and sparklings) is doing too much damage to either your dps or healer, use the tank to taunt it.
- Tank should taunt the boss (don't taunt the black priest!!) and keep the boss at 6M AWAY from the rest of the DPSers/HEALER. This is because the boss has a spell that will blind whoever within 6m vicinity of it.
- Start off by killing Black Priest (Elite) first! Full dps on this guy with Denzil 'tanking'.
- Position your characters so they can intercept the Sparklings' heals by standing in front of the path of the heals.
- Kill both Sparklings next.
- Then it's free kills - you can kill whoever you want first - I'd go after the most damaging mob - the boss doesn't really hit very hard :P
Puzzle 7
This one's similar to Puzzle 2.- the crystals light up in the same order. However, this time, there are several crystals that are already lit.
Puzzle 8
It's similar to puzzle 3 except that this time, for the stone plates in middle, two reference symbols will light up.
So, in between puzzle 8 and 9 I've noted that there's another elite Necromancer fight. I'm too lazy to draw this out but the mechanics of this fight is the same as before - get the necromancer away from the mobs that you want to kill or vice versa and then kill them. Use your tank's taunt to lure necromancer away + some mobs, then lure the mobs away from the necromancer one by one using your DPS. The necromancer should be the last to die.
The red boxes will make your character jump 3 boxes forward
The purple boxes will make your character jump 1 box forward
 |
| Aarklash Legacy: Puzzle 1 guide |
Puzzle 2

Puzzle 3

Third boss fight - Lord of Pain

Puzzle 4
This one's pretty straight-forward, but you'll need precision and good timing :) So, what you'll need to do is to get each of your characters down each lane and step on the stone plate at the end. How to do that?
- First, AVOID THE BLUE STUFF - they teleport you back to the start of each lane.
- Note that there's a BLUE STUFF patrolling the stone plates at the end of each lane, so you DON'T STAND YOUR CHARACTER ON THE STONE PLATE unless you have ALL characters NEAR to the plates (refer to screenshot below).
- Optional: I'd recommend you to SAVE before attempting to step on the stone plates. Just in case your timing is off and your character gets teleported to the start of the lane.
- Then, one by one, stand your characters on the plates, the last one might be a bit tricky - you'll need to be fast.
- Once all characters are in place, the door will open! :)
 |
| If you don't want to redo, save before your characters step onto the stone plates. Just in case... you know :P |
Puzzle 5
This is pretty straight-forward as well. Pull the lever according to the symbols that the game wants and you don't even need to pull the levers in any order.
There are 3 rounds.

Puzzle 6
This one's simple :) Just step on the stone plates according to the guide provided below and you're done! :)

 |
| Here's a screenshot of the puzzle after you're done :P |
Fourth boss fight - boss is the same one from the First boss fight.
However, the fight mechanisms here are a bit different - there are other mobs in the vicinity that you'll need to kill first. Follow the instructions below and ignore other mobs. If the other mob (excluding black priest and sparklings) is doing too much damage to either your dps or healer, use the tank to taunt it.
- Tank should taunt the boss (don't taunt the black priest!!) and keep the boss at 6M AWAY from the rest of the DPSers/HEALER. This is because the boss has a spell that will blind whoever within 6m vicinity of it.
- Start off by killing Black Priest (Elite) first! Full dps on this guy with Denzil 'tanking'.
- Position your characters so they can intercept the Sparklings' heals by standing in front of the path of the heals.
- Kill both Sparklings next.
- Then it's free kills - you can kill whoever you want first - I'd go after the most damaging mob - the boss doesn't really hit very hard :P
 |
| A simple strategy map to help you understand better. |
Puzzle 7
This one's similar to Puzzle 2.- the crystals light up in the same order. However, this time, there are several crystals that are already lit.
 |
| The puzzle... before I started solving it :P |
 |
| The step-by-step guide for Puzzle 7 :) |
 |
| If you're rushing for time, check out this summarized version. :) |
Puzzle 8
It's similar to puzzle 3 except that this time, for the stone plates in middle, two reference symbols will light up.
 |
| Puzzle 8 guide :) Finally got this to work :) |
Puzzle 9
Puzzle 10
This one's an easy one, just pull the respective lever that correspond to the correct reference symbol shown. You don't even need to pull the lever in any order.
Puzzle 11
Similar to puzzle 8 but this time I forgotten to jot down the reference symbols. I only have the answer though :P A note: do use this guide with caution. I suspected that I've messed up the number orders somehow.

Puzzle 12
It took me ages to try (with no luck), but in the end, you just needed 2 steps to complete the puzzle. Garh... why am I so stupid?! goshdarnit
Puzzle 13

Fifth boss fight (Act II) - Flesh and plague golem
2 bosses here - Flesh golem and plague golem. As usual, read their skills first before engaging. If you did that you'll quickly realised that
1. Due to the skill 'association from the deep', you'll need to kill Plague golem first
2. Flesh golem can heal the plague golem (not much though - a few hundred health) and will cause 100% reduced healing received (4m around boss)
3. Flesh golem has a very devastating spell that will boost its spell damage by 2000% (called 'heritage of abyss') and unleash a sure-kill on the character that it is targeting.
There are 2 ways to tackle this IMHO.

New mobs in Act III
So, you'll be getting new mobs for Act II but don't worry! As long as you follow this, you should be fine:
1. Kill anything that heals FIRST - if it can heal a lot without incantation time - then it should be the top of your list of things to kill.
--- If it can ONLY self-heal, then it's not very important.
--- If the heal can be intercepted, then it is not important as well (but you'll need to position your character accordingly).
--- An example: Son of hydra
2. Kill anything that has very long crowd control (CC) spells - like charm, knockdowns, etc
3. Kill anything that has buffs that will cause major disadvantage to your team (excluding slowing movement speed, reduced heals -- these are not really important) - such as silence, cast invulnerability to other mobs, block support spells etc OR has AOE damage/ can damage more than 1 target at a time (you can handle damage but can you handle huge damage to ALL of your characters at the same time? I think not :P).
4. The rest of the mobs in whatever order you like
(Stuff like damage is not really important since your healer should already be decked out in great gear and is high level)
And the usual advice still stands - do not stand in anything that damages your characters, use pause to avoid pass-through projectiles (these spells can cause a lot of damage )
Sixth boss fight (Act III) - Hydra
For this boss, you'll need to do plenty of running. The boss has 4 skills, but only 3 are really important (the other 1 you can handle the damage, it's no biggie): Note that ALL of these spells are not-interruptable due to its passive skill.
1. Chaos bombardment - There will be a red circle with a skull - STAY AWAY from the red circle (it can be anywhere around the boss so keep your eyes peeled!).
2. Chaos crush - There will be a red circle with a skull 8m in diameter around the boss - STAY OUT of the red circle.
3. Anger of hydra - Kills all if not in the marked zone - RUN into the MARKED ZONE ASAP (it can be anywhere around the boss so keep your eyes peeled!)
For this boss, you mustn't hesitate! When you see a circle, act immediately or you may run out of time
All of these spells have the same red casting circle, so pause the game, mouse over the circle to see what spell it is casting and then act accordingly. There are circles on the ground to aid you too.
Furthermore, since you'll be running around, positions are not really important. As long as your casters are all bunched together (so they can move together) and the tank is near the boss, you should be fine.
Puzzle 14
This is not really a puzzle I suppose, but meh, I'll just put it up here.... later :P
Seventh boss fight (Act III) - Lord of Pain
Same strategy as the third boss fight. Lots of running around.... so use PAUSE to your advantage! :)
A few simple rules
1. When you see a green circle, run all your characters towards it. Then after that, move your characters back to original positions.
2, if you see a red circle with a skull on the ground, get away from it! BUT, if the circle follows your character, then leave that character be and move the rest of your characters away from the red circle.
3. Sometimes you just cannot hesitate or finish your channeling or something, just run!
Puzzle 15
A new kind of puzzle! It's very simple actually, you need to lead the ball of blue light from one face-mask thingy to the other face-mask thingy, but the tough part is how? :P

Puzzle 16
It's a new kind of door-and-switches-based puzzle.

Puzzle 17
A more complex door-and-switches-based puzzle.

2x Elemental of Light
When fighting these mobs, you should
1. Kill all the sparklings first
2. The rest of the more annoying mobs
Puzzle 18
This one can be a bit tough, but I got it in the end. You'll need to track the ball of light and at the right moment turn on/off the switch. So, in this case, you could stand your character beside the switch at ready, and then turn it on/off by moving the character onto the button at the exact time.
Diagram pending*
Then, you'll reach a 5 portal room.
 You can complete the first 4 portals in whichever order you like. I had to label the order that I did it, so that it's easier for you to refer to my solution diagrams for the puzzles in each of the portals. :)
PORTAL 1 puzzle
Diagram pending*
PORTAL 2 puzzle

Diagram pending*
PORTAL 3 puzzle
Diagram pending*
PORTAL 4 puzzle
Diagram pending*
PORTAL 5 - Final boss battle: Lockshy
This boss is a real piece of work... expect plenty of dying and resurrecting for your first time lol. Right, down to business! Boss skills:
Lockshy has an unknown passive skill and 4 known skills:
1. Laceration (1000 dmg over 20s) -
2. Opal whip (3s incantation, 800 dmg) - I didn't bother to interrupt, just keep your fellow characters at least 6 m away from the BOSS. The tank, however, will have to bear the damage - it's not worth it to run your tank away from the boss and back again... it's better if you keep your eyes out for craters and for casting instead.
3. Opal menace (3s incantation, 300 dmg) - I didn't bother to interrupt, just keep your fellow characters at least 6 m away from each other. This makes getting a full caster team (excluding the tank) an advantage, since the boss is stuck in its position and you have only limited space for melee characters.
4. Opal crater - use pause to your advantage and move your characters AWAY from any crater IMMEDIATELY (though it can be a bit hard to spot initially). Note that the craters DO NOT disappear so position your characters carefully and don't get your characters trapped by being surrounded by the craters. If you want to move your characters away from a crater, I would suggest moving all of them in the same direction.
So, thanks for the help with puzzle 12, I've finally finished the game! :) Now, onwards to newer games lol :P Stay tuned for more game reviews (and if I have the time, walkthroughs) for both popular and obscure yet rewarding games!
UPDATE: If you love Aarklash Legacy, you should definitely try Pillars of Eternity. It's not as detailed as Aarklash and is more similar in some ways to Dragon Age, but it's pretty fun. Beware of several major glitches in that game though!
 |
| Just do it like this. I have absolutely no idea why this is so. I just try until I get it right :P And I got it right on my second try hehe... |
This one's an easy one, just pull the respective lever that correspond to the correct reference symbol shown. You don't even need to pull the lever in any order.
Puzzle 11
Similar to puzzle 8 but this time I forgotten to jot down the reference symbols. I only have the answer though :P A note: do use this guide with caution. I suspected that I've messed up the number orders somehow.
Puzzle 12
 |
| Credits to zhuge tzarn xing. Thanks! :) |
Puzzle 13
 |
| Am solving the puzzle mid-way :) |
Fifth boss fight (Act II) - Flesh and plague golem
2 bosses here - Flesh golem and plague golem. As usual, read their skills first before engaging. If you did that you'll quickly realised that
1. Due to the skill 'association from the deep', you'll need to kill Plague golem first
2. Flesh golem can heal the plague golem (not much though - a few hundred health) and will cause 100% reduced healing received (4m around boss)
3. Flesh golem has a very devastating spell that will boost its spell damage by 2000% (called 'heritage of abyss') and unleash a sure-kill on the character that it is targeting.
There are 2 ways to tackle this IMHO.
New mobs in Act III
So, you'll be getting new mobs for Act II but don't worry! As long as you follow this, you should be fine:
1. Kill anything that heals FIRST - if it can heal a lot without incantation time - then it should be the top of your list of things to kill.
--- If it can ONLY self-heal, then it's not very important.
--- If the heal can be intercepted, then it is not important as well (but you'll need to position your character accordingly).
--- An example: Son of hydra
2. Kill anything that has very long crowd control (CC) spells - like charm, knockdowns, etc
3. Kill anything that has buffs that will cause major disadvantage to your team (excluding slowing movement speed, reduced heals -- these are not really important) - such as silence, cast invulnerability to other mobs, block support spells etc OR has AOE damage/ can damage more than 1 target at a time (you can handle damage but can you handle huge damage to ALL of your characters at the same time? I think not :P).
4. The rest of the mobs in whatever order you like
(Stuff like damage is not really important since your healer should already be decked out in great gear and is high level)
And the usual advice still stands - do not stand in anything that damages your characters, use pause to avoid pass-through projectiles (these spells can cause a lot of damage )
Sixth boss fight (Act III) - Hydra
For this boss, you'll need to do plenty of running. The boss has 4 skills, but only 3 are really important (the other 1 you can handle the damage, it's no biggie): Note that ALL of these spells are not-interruptable due to its passive skill.
1. Chaos bombardment - There will be a red circle with a skull - STAY AWAY from the red circle (it can be anywhere around the boss so keep your eyes peeled!).
2. Chaos crush - There will be a red circle with a skull 8m in diameter around the boss - STAY OUT of the red circle.
3. Anger of hydra - Kills all if not in the marked zone - RUN into the MARKED ZONE ASAP (it can be anywhere around the boss so keep your eyes peeled!)
For this boss, you mustn't hesitate! When you see a circle, act immediately or you may run out of time
All of these spells have the same red casting circle, so pause the game, mouse over the circle to see what spell it is casting and then act accordingly. There are circles on the ground to aid you too.
Furthermore, since you'll be running around, positions are not really important. As long as your casters are all bunched together (so they can move together) and the tank is near the boss, you should be fine.
 |
| Read all the skills the enemy has! I simply cannot stress this enough. |
This is not really a puzzle I suppose, but meh, I'll just put it up here.... later :P
Seventh boss fight (Act III) - Lord of Pain
Same strategy as the third boss fight. Lots of running around.... so use PAUSE to your advantage! :)
A few simple rules
1. When you see a green circle, run all your characters towards it. Then after that, move your characters back to original positions.
2, if you see a red circle with a skull on the ground, get away from it! BUT, if the circle follows your character, then leave that character be and move the rest of your characters away from the red circle.
3. Sometimes you just cannot hesitate or finish your channeling or something, just run!
 |
| My characters' positions - positions aren't really important here as long as you keep your characters slightly away from each other. |
 |
| Same strategy map as for boss number 3 :) |
A new kind of puzzle! It's very simple actually, you need to lead the ball of blue light from one face-mask thingy to the other face-mask thingy, but the tough part is how? :P
 |
| Please take this with a pinch of salt... might have gotten the numbers wrong somehow. Sorry! |
Puzzle 16
It's a new kind of door-and-switches-based puzzle.
Puzzle 17
A more complex door-and-switches-based puzzle.
2x Elemental of Light
When fighting these mobs, you should
1. Kill all the sparklings first
2. The rest of the more annoying mobs
Puzzle 18
This one can be a bit tough, but I got it in the end. You'll need to track the ball of light and at the right moment turn on/off the switch. So, in this case, you could stand your character beside the switch at ready, and then turn it on/off by moving the character onto the button at the exact time.
Then, you'll reach a 5 portal room.
PORTAL 2 puzzle
Diagram pending*
PORTAL 3 puzzle
Diagram pending*
PORTAL 4 puzzle
Diagram pending*
PORTAL 5 - Final boss battle: Lockshy
This boss is a real piece of work... expect plenty of dying and resurrecting for your first time lol. Right, down to business! Boss skills:
Lockshy has an unknown passive skill and 4 known skills:
1. Laceration (1000 dmg over 20s) -
2. Opal whip (3s incantation, 800 dmg) - I didn't bother to interrupt, just keep your fellow characters at least 6 m away from the BOSS. The tank, however, will have to bear the damage - it's not worth it to run your tank away from the boss and back again... it's better if you keep your eyes out for craters and for casting instead.
3. Opal menace (3s incantation, 300 dmg) - I didn't bother to interrupt, just keep your fellow characters at least 6 m away from each other. This makes getting a full caster team (excluding the tank) an advantage, since the boss is stuck in its position and you have only limited space for melee characters.
4. Opal crater - use pause to your advantage and move your characters AWAY from any crater IMMEDIATELY (though it can be a bit hard to spot initially). Note that the craters DO NOT disappear so position your characters carefully and don't get your characters trapped by being surrounded by the craters. If you want to move your characters away from a crater, I would suggest moving all of them in the same direction.
 |
| Loch is not properly positioned, but wth, my Wendaroo is awesome and can heal almost anything (with Nella as backup heals) |
 |
| Run AWAY from any craters. Try to spot them as they are forming in order to avoid taking any damage (or at least minimal damage). These craters hurt real bad! |
 |
| Craters don't disappear... at least not for a very long time. Plus, the proper position of Loch is depicted here :) |
So, thanks for the help with puzzle 12, I've finally finished the game! :) Now, onwards to newer games lol :P Stay tuned for more game reviews (and if I have the time, walkthroughs) for both popular and obscure yet rewarding games!
UPDATE: If you love Aarklash Legacy, you should definitely try Pillars of Eternity. It's not as detailed as Aarklash and is more similar in some ways to Dragon Age, but it's pretty fun. Beware of several major glitches in that game though!
P/S: I hope you can understand what I'm trying to convey through these maps/drawings :) Have fun!
I would love to make video walkthroughs for you guys but my computer cannot handle all the Fraps footage (1GB plus per video of a few minutes? WTF...) Real sorry. I hope my strategy maps/guides help :P
You can buy Aarklash Legacy at Amazon here.
I would love to make video walkthroughs for you guys but my computer cannot handle all the Fraps footage (1GB plus per video of a few minutes? WTF...) Real sorry. I hope my strategy maps/guides help :P
You can buy Aarklash Legacy at Amazon here.
Crap puzzle. Just press the 2nd one then the 4th one of the middle row, counting from left to right.
ReplyDeleteOr check this video on about 3:30
https://www.youtube.com/watch?v=CRSkgptNKIA
Thank you very much, found alot of great information all in one place
ReplyDeleteNo problem. This game is a gem, but it's really unfortunately that not many people know about it. :)
DeleteI'm glad this is of some help to you :)
ReplyDeleteUnfortunately, I'm defeated by one of the puzzles and am unable to finish the walkthrough. Don't worry though. I'll try to get help from other people to try to solve it and when I finally get the solution, I'll continue this walkthrough. :)
Chanced upon your blog when I was looking for stuff on Aarklash:Legacy of which there is a dearth of information. A shame really, as its one of the better RPGs out there. Nicely presented article that you have here, and as I would like to help you along, here's my contribution for puzzle 12:
ReplyDeletehttp://postimg.org/image/ptnja2ql1/
In case you're wondering, I didn't exactly solve it in 2 steps when I was playing as I didn't know the rules beforehand in terms of crystal changes. I used the pressure plate before the crystals to reset the crystals to their original state once I had things figured out. Good luck and have fun :)
You're a life saver! xD
DeleteThank you!
For the Flesh golem and The plague golem i use to steal the buff from the flesh golem (those who pu +2000% of magic damage) with wandaroo, and i put it on the magician with ligtning focus.
ReplyDeleteThe lighning against the plague golem kil him in 2 sec chrono. After you can peacefully kill the flesh golem.
All is in the timing, the buff last 3 sec, so you need to anticipate the timing beetween the the boss casr his spell to steal it with wendaroo and give it to nela and casrt lightning.
Hope it will help you :)
That sounds like a nice strategy as well - I died quite a lot during that stage but still managed to get through it on the first go.
DeleteIt's not fun to keep needing to ress people while trying to avoid damage :P